
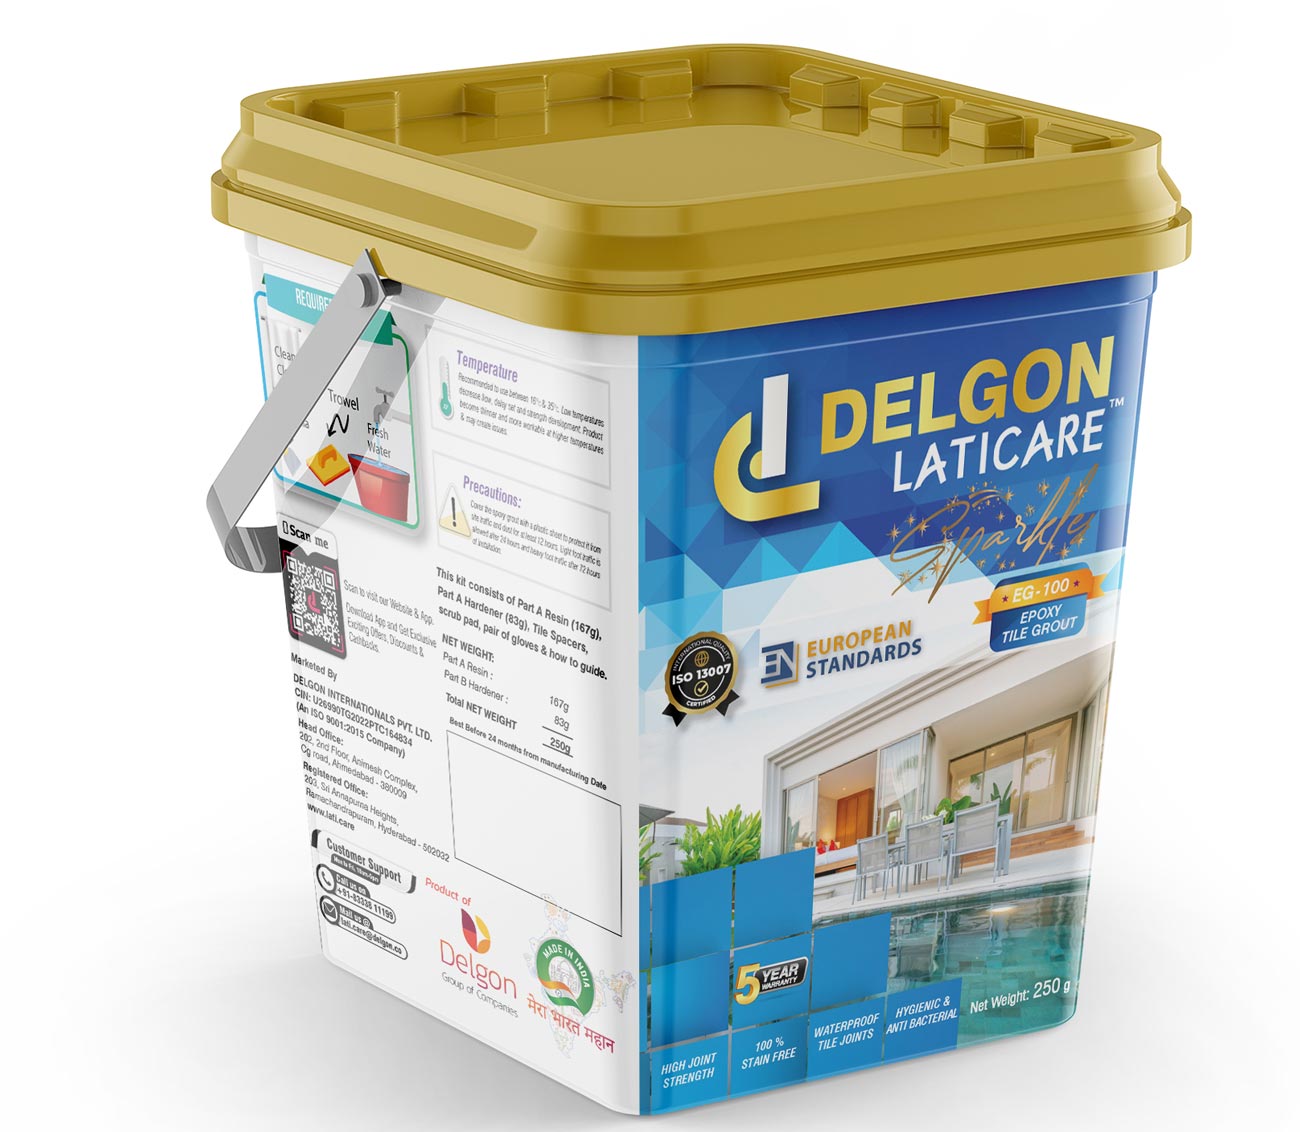
Designed to add extra sparkle to even the plainest wall or floor tiles, glitter grout guarantees your tile space has a luxurious feel.
Delgon Laticare Glitter/Sparkle Tile Grout with C19 Epoxy Resin is a premium quality grout designed to enhance the beauty of tiles. It is known for its unique glitter or sparkle effect, which adds a touch of glamour to any space. When combined with C19 epoxy resin, it creates an even stronger and more durable grout that is highly resistant to staining, cracking, and other types of damage.
The glitter or sparkle effect of Delgon Laticare Glitter/Sparkle Tile Grout is achieved through the use of a blend of fine glitter particles that are mixed into the grout. The result is a beautiful and eye-catching finish that is perfect for use in a variety of settings, from residential bathrooms to high-end commercial spaces.
C19 epoxy resin is known for its exceptional strength and durability, making it an ideal choice for use in grout. When combined with Delgon Laticare Glitter/Sparkle Tile Grout, it creates a highly durable and long-lasting solution for grouting tiles. It is highly resistant to chemicals, making it ideal for use in areas where exposure to harsh substances is common.
Delgon Laticare Glitter/Sparkle Tile Grout with C19 Epoxy Resin is easy to work with and can be applied to a wide range of surfaces, including ceramic, porcelain, natural stone, and glass. It is available in a range of colors and glitter sizes to complement any design style and can be mixed with additives to enhance its performance.
Overall, Delgon Laticare Glitter/Sparkle Tile Grout with C19 Epoxy Resin is a beautiful and durable solution for grouting tiles. Its unique glitter or sparkle effect and exceptional properties make it a popular choice among architects, designers, and contractors who are looking for a reliable and attractive solution for their grouting needs.
Here are some features of Delgon Laticare Glitter/Sparkle Tile Grout with C19 Epoxy Resin:
Overall, Delgon Laticare Glitter/Sparkle Tile Grout with C19 Epoxy Resin is a beautiful and durable solution for grouting tiles. Its unique glitter or sparkle effect and exceptional properties make it a popular choice among architects, designers, and contractors who are looking for a reliable and attractive solution for their grouting needs.
Make sure that the ceramic tiles can be cleaned easily and their surface is not absorbent. In fact, some types of tiles (e.g., polished porcelain tiles) or natural stones feature micro-porosities and surface roughness that can cause surface staining and make cleaning very difficult. In these cases, it is advisable to perform a spot test and, in any case, avoid using sealants with contrasting or very dark colours. Check that the adhesive or mortar used for bonding the tiles is completely hardened and dry. The joints must be clean and free from dust and any debris. Any traces of adhesive or mortar flowing between joints and plastic spacers must be removed.
Pour component B (Hardner) into component A (Resin) and mix them well, then add component C (Filler Powder) into the mixture. We recommend pouring all the catalyst contained in the bucket. Mix with the help of a drill mixer to obtain a smooth, lump-free mix. Hand mixing is not recommended. The three parts are pre-batched in their packaging, avoiding , this way, all risk of mixing errors.
Part A: 2 parts by weight
Part B: 1 parts by weight
Part C: 9 parts by weight
The three parts are pre-batched in their respective packaging.
Apply the paste in the joints using a rubber float (item 946GR), removing any excess product. For large surfaces, it is possible to use a single electric brush equipped with an abrasion-resistant rubber trowel. The product’s working life and hardening time is strongly dependent on the ambient temperature. The optimum application temperature is between +18°C and +23°C. Under these conditions, the product is soft, easily workable and with a working life of approximately 1 hour. It is ready for foot traffic after 24 hours. The surface can be commissioned after 7 days at a temperature of +23°C. At temperatures between +8°C and +12°C, the product is highly consistent and difficult to apply. The hardening time is also lengthened considerably. Do not add water or solvents to improve workability. In hot weather it is advisable to apply the product to the floor as quickly as possible so as not to shorten further the working life due to the reaction heat in the container. In particular, this requirement applies to 10 kg packs.
The grout work must be cleaned and finished while the product is still wet and, in any case, in the shortest possible time.Take care not to remove product from the joints or leave stains on the tile surface. This operation can be performed either manually or by using a special electric single brush with felt.
First sprinkle clean water over the grouted surface. Perform an initial cleaning with a trowel equipped with a damp white felt (item 109 GBNC) to remove excess product, making circular movements clockwise and anticlockwise, in order to perfectly seal the sides of the tiles and to remove any excess sealant from the tile surface. Complete a second cleaning cycle with a sweepex sponge (item 128G0001) for smooth and gap-free grout, completely removing the product from the tiles, making sure that you do not remove any grout from the joints, and drying any excess water. For easier cleaning operation, we recommend using two bucketfuls of water, one for rinsing felt and sponge and to collect any dirty water, and the other to use clean water for the final surface cleaning. When felt and sponge are impregnated with resin and can no longer be used, they must be replaced. Any product residue left behind on the surface of ceramics can be removed using Litonet and Litonet Gel detergents after about 24 hours and in any case once the grout has hardened.
After removing any excess grout from the surface, sprinkle plenty of clean water over the grouted surface. Then start cleaning with the single brush equipped with felt. Remove and collect the water-sealant emulsion from the floor with a rubber rake. Replace the felt disc when it is fully impregnated with product.
Apply the paste onto the substrate using a notched trowel with suitably sized teeth and lay the tiles exerting strong pressure. In the case of floors subject to heavy traffic or swimming pools, apply the tiles with the back-buttering method, in order not to leave gaps between substrate and tile.
 Add to Cart
Sale!
Add to Cart
Sale!
 Add to Cart
 Add to Cart
New!
Add to Cart
New!